Ford Focus RS MK2 - Martin Bowen
Entered for the March 2016 competition.
Enter Competition | Back to Entries
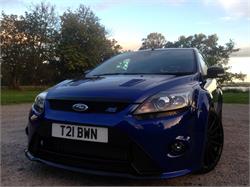 |
Name: Martin Bowen
Make: Ford
Model: Focus RS MK2
Year: 2010
Viewed: 5783 times.
Votes/Comments: 11
|
Send to a Friend
|
Products Used
How Martin Used Our Products
After purchasing my RS in Birmingham and driving the painfully long journey back home to Aberdeenshire, it was made clear to me after the first wash that the previous owner didn't care much for paintwork. Although extremely clean inside (the protective wraps were still on the door sills!) the only thing letting the RS down was the condition of the paintwork. Full of swirls, RIDS and hazing, it needed some serious TLC before I deemed it suitable.
Before any detailing commenced I took a few days to repaint the bonnet vents Performance Blue to match the paintwork and also strip the brake calipers, paint them silver and reassemble them with new seals and pistons. I also foamed, rinsed and undersealed the car with Bilt Hamber Dynax UC. Extensive process but protects the underside from deadly salt corrosion as the roads in Aberdeenshire tend to be clarted with the stuff in the colder months. I left the calipers and vents to cure for a good 7 days before I performed the detail as I wanted to seal them with GYEON coatings, so the paint needed to be properly cured.
Interior:
The interior didn’t need much, if any, work. Just a thorough vacuum and quick wipe down of all surfaces. The split black alcantara/leather seats were cleaned using a Karcher steam cleaner then protected with GYEON Leather Coat and Fabric Coat. Gtechniq C6 Matte Dash was used to protect almost every other interior surface to leave a factory finish while adding some abrasion resistance. The glass was cleaned with a mix of 99% IPA @ 3:1 and was worked in and buffed off with a Meguiar’s MF Applicator pad – currently my favourite method for window cleaning as it is the only method I've found that doesn’t leave lint or streaks.
Engine Bay:
Much like the interior, the engine bay didn't need much attention. A quick hot rinse and spritz with Gtechniq Citrus APC and a quick scrub with some brushes was sufficient. EZ Detail brushes came in useful for getting to any tight crevasses. The bay was then rinsed with an open ended hose using filtered water from the Aqua Gleam 0ppm.
Wheels:
After safely jacking the car up and using old MF cloths to prevent my jack and stands from doing damage to the subframe, I removed two wheels at a time, rinsed at pressure with hot water then soaked in Autosmart Smart Wheels at 3:1 before detailing out every possible crevasse with a selection of brushes and a Meguiar's Microfibre Wash Mitt. The wheels were then soaked in GYEON IRON for 10 minutes before against being agitated with brushes then rinsed with the open ended hose. During this process I used two buckets for my wheel and arch cleaning duties, both filled with hot water and containing grit guards. My bucket of shampoo solution is always Meguiar’s Hyper Wash as it’s extremely cost-effective, provides decent lubrication and smells nice too.
Arches:
I rinsed the arches at pressure with hot water before removing the front and rear liners to give them a deep clean. I then soaked the front and rear liners, calipers, lovely purple H&R springs and every other reachable area of the wheel arch in Gtechniq Citrus APC diluted 10:1 with deionised water. I allowed the cleaner 5 minutes to do its work before using brushes to agitate all the dirt that had been trapped over the years. After a thorough rinse everything was sprayed with GYEON IRON to dissolve any iron particles and left for 10 minutes before once again agitating before a final rinse with filtered water. During this process I regularly rinsed out my brushes to reduce any chance of scratching. I then used my Metro Vac to blast as much water out of every crevasse as I could. This was the stage where the entire vehicle including arches were undersealed using BH Dynax UC.
Arch Liner protection:
Once cleaned and dried I drenched the rear fabric liners in 303 Fabric Guard and left them to dry overnight. As for the front arch liners, they were cleaned thoroughly and left to dry before refitting and coated with Gtechniq T1 Tyre & Trim.
Bodywork:
I first cleaned all the shuts around the doors, bonnet and boot area. I also removed the rear lights to gain access to the excessive amount of dirt which lay beneath. This area is often overlooked on this generation of Focus and is probably the dirtiest. After they were cleaned I protected the area with GYEON CURE before refitting the lamps. The same process was done with the fog/reverse lamps as well as the rear diffuser removed to properly clean and polish the exhaust tips with a combination of Auto Finesse Mercury and 0000 grade steel wool.
The rear bumper was removed to detail and protect the underlying surfaces, same was done for the front bumper. Single-sided rubber adhesive was applied to prevent the bumper rubbing against the rear quarter panels, an issue which is known to cause rust issues on the RS.
The front bumper was also removed to detail all underlying surfaces, purely to satisfy my OCD.
The rear spoiler was also removed to detail underneath it and remove and re-apply the protective seal in order to cut down rattling and water ingress– another known issue on the RS.
After everything was replaced the entire car was blanketed in a layer of hot AF Avalanche foam. This was allowed to dwell for 15 minutes before every area of the car was thoroughly rinsed. I then used Gtechniq Citrus APC and a detailing brush to clean around all the window seals, panel gaps, badges, grilles and emblems. Once again the car was rinsed before washing from top to bottom using the two-bucket method with GYEON Bathe, using a lambswool mitt for the upper panels and the microfiber mitt for the lower 6 or so inches of the car. After a thorough rinse it was ready for decontamination.
Tardis was applied panel at a time and allowed to dissolve any contamination before being wiped off. Some areas of stubborn contamination required a few applications to remove. Once the entire vehicle was done in this fashion it was thoroughly rinsed before being drenched in GYEON IRON and allowed to sit for 15 minutes, being careful not to let the product dry out (it was quite cold outside so the risk was minimal). This allowed 95% of surfaces to become contaminant free, only a couple of areas required claying with GYEON Clay, using IRON as clay lubricant. The car was rinsed at pressure before being rinsed with an open ended hose and water through the Aqua Gleam 0ppm filter. Every panel gap was then dried with plush towels and the Metro Vac, the same was done for the engine bay. The car could finally be pulled indoors.
Correction:
Paint was measured all round before using a Meguiar’s G220v2 DA polisher, a selection of Lake Country hydro-tech pads and a combination of Meguiar’s #105, #205 and Menzerna polishes and compounds. On a couple of trickier sections, I had to use the Meguiar’s Microfibre Correction Compound and MF cutting discs, but the majority of the vehicle didn’t need this level of cut. The entire car looked absolutely amazing once finished, revealing a sharp, high gloss finish.
Glass:
All exterior glass (excluding wing mirrors as they are plastic on the Focus) was polished using CarPro CeriGlass on a Rayon Glass Polishing Pad on my Meguiar’s G220v2. I then wiped down all glass with 99% IPA at 3:1 before 3 layers of Gtechniq G1 was applied to all the glass surfaces and wing mirrors, allowing sufficient curing time between each coat.
Paint Protection:
I wiped the entire car down with a lambswool duster to prevent light marring from dust, before wiping all panels down GYEON PREP. I then applied one layer of GYEON PRIME to every painted surface, making sure to buff off every single smear using high intensity lighting to check my work. GYEON TRIM was applied to all plastic trim such as the aerial, roof rail strips, plastic trim around the windows and wing mirrors, high level brake lamp lens, headlights, taillights, front ‘Ford’ badge, the freshly fitted ‘RS’ badge, surrounding plastic mesh, reverse lamp, rear fog lamp and clear indicator strips on the wing mirrors. Oh and rear wiper arm, front wiper arms, scuttle panel and number plates. I think that’s everything…
Exhausts, calipers and wheels:
While the coatings were curing I completely sealed all four wheels with Auto Finesse Mint Rims (I plan on getting the wheels refurbed soon therefore no point adding an expensive sealant just yet). I polished the exhaust tips (and back box) again with Meguiar’s NXT Metal Polish as it gives a sharper finish than AF Mercury, before cleaning with GYEON PREP and coating the exhausts and calipers with 2 layers of GYEON RIM (1 hour apart) to produce an extremely slick finish that will be easy to maintain for many months.
Final Steps:
After 24 hours all exterior surfaces (excluding glass) were wiped down with GYEON CURE to protect the fresh coatings from water spots during their first week out in the elements. This resulted in a deeper, rich paint colour showing that GYEON Prime was clearly doing its work at creating a sacrificial layer over the Performance Blue paintwork.
The tyres and front arch liners were dressed with Gtechniq T1 which gave an amazing satin sheen while adding incredible oil and water repellency. The engine bay was also dressed using Auto Finesse Dressle to give a non-sticky, natural satin effect.
After a week or so I noticed a few areas of water spotting so decided to use GYEON WATERSPOT to quickly wipe down these areas after the car had been washed. This product immediately removed the fresh spots restoring perfect clarity to the surface. Affected panels were then washed and dried before being protected again with CURE.
Hopefully the photographs do the car justice after having spent ~100hours on the full detail – it looked absolutely stunning! The car is now regularly maintained with GYEON WETCOAT and CURE to extend the amazing effects of the Prime base coat.
Enjoy :)
Report Abuse